|
How to Import Textures
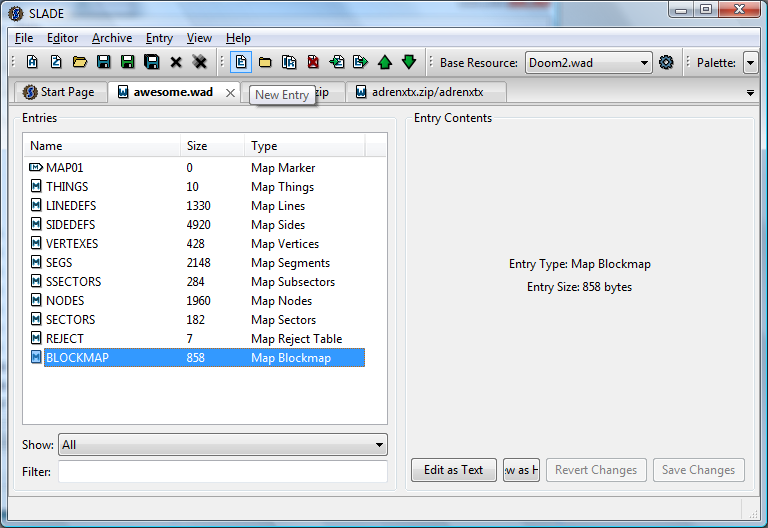
This is a simple tutorial that will teach a few basics about Doom lump management. IntroductionIn this tutorial, the object is to import textures from a texture pack into a .WAD file containing a map. First, we need a work-in-progress map. We were working on an awesome level, but felt like it needed new textures to express its full potential, and here we will show how to merge a texture pack into the map file so as to have these new resources at our disposal once we go back in map editing mode. Pictured: an awesome map.
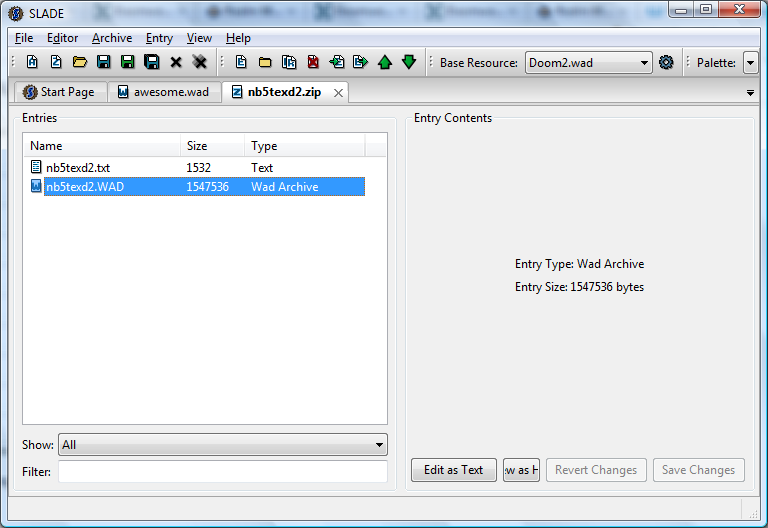
Pre-formated texture packWe have our map, now to add a texture pack. In this tutorial, we'll get Nick Baker's 5th episode set. It's already in the Doom format so it's simpler. Download it and open it with SLADE.
It's a wad within a zip. Not a problem, SLADE can open zips and wads just as easily. In fact, you can even open the wad from within the zip; just double-click on it.
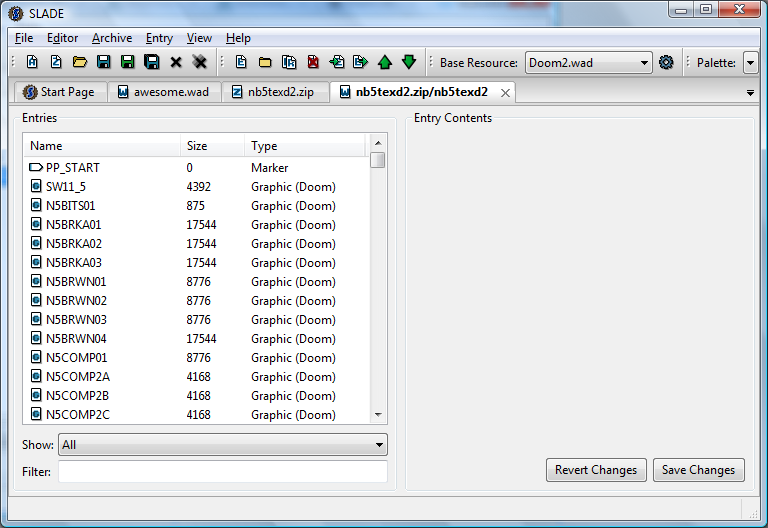
And now you can see the content of the texture pack. Notice how the tab name tells you this archive is opened from within another archive. Now, to copy that inside the map. Just select everything. Click on the first entry, hit Now that everything is selected, right click on the mass to make the context menu appear.
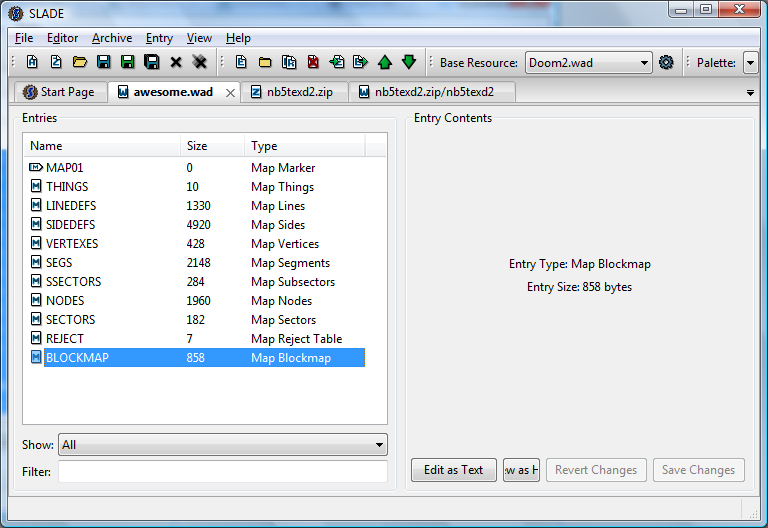
Click on "copy", then go back to the tab corresponding to your map mod. You should never disturb the order of map lumps or it could break the map. So, select the last map lump; here the
Right-click to make the context menu appear, click on "paste", and all the copied entries from the texture pack are now inserted after the
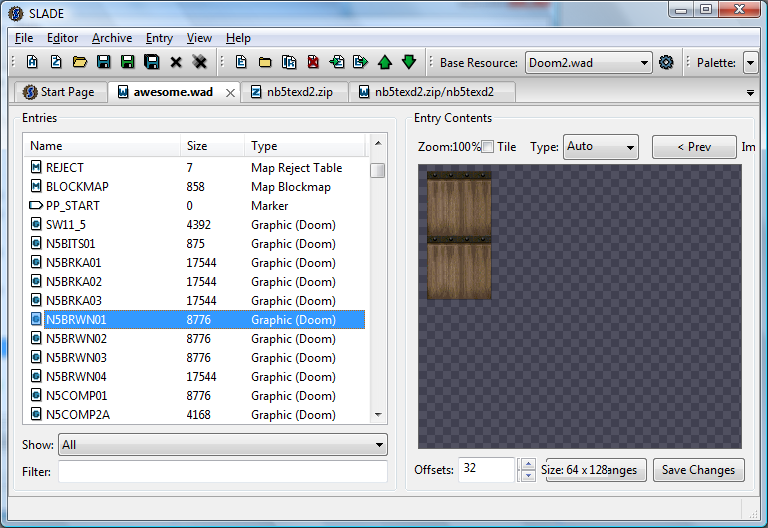
Notice how the copied lumps appear in green: this means that these are new lumps, not saved yet. Slade color-code entries this way so you can easily tell which entries are new (green), which are modified (blue), which are read-only (red) and which are safely saved to disk (black). What these green lumps tell us is therefore that we need to save our work. Click on the
We have saved the file. Notice how all entries are no longer green but black, showing that they are in the same state in memory as they are in the file.
You can now browse through the graphics and perhaps modify them further. Turning images into texturesNow this was easy because the 5th episode set is already set up as Doom expects flats and textures to be set. What to do if instead the texture pack is just a collection of images? We'll see with a second example, using this time the Adrenix Texture Pack, which are textures taken from Adrenix. Here, the textures are presented in a format compatible with some source ports, notably ZDoom, but not all, so we will see how to convert it to the Doom format. First, download and open the pack.
Now, let's set up a bit to prepare for adding flats and textures. Create the following entries as marker lumps, in order: So, click on the "New entry" icon...
And name the entries
Once you're finished, it should look like this:
FlatsZDoom lets you use any type of texture on any type of surface, but "vanilla" Doom makes a distinction between "flat" textures (for use on floors and ceilings) and wall textures. In the Doom modding jargon, a flat is a floor or ceiling texture, and the word "texture" is used exclusively for wall textures. Adding flats is simple, so we'll start with this.
Flats have two restrictions: first, they need to be 64x64 pixels in dimension, and secondly, they need to be entirely opaque. Since there wouldn't be anything above or below, flats cannot have transparency. Here I took some of the first textures from Adrenix that met the criteria, and that looked like they'd make more sense on a ceiling than on a wall. Flats have to be placed between the
As you can see, they are PNG graphics, and Doom cannot work with them (contrarily to source ports such as ZDoom). So we have to convert them. Since we want flats, we will convert them to "Raw Format (Flat, Colormap, etc.)".
Look at the two preview graphics. One show you the image as it currently is, the other show you as it will be once converted. You can see the colors are slightly off in the converted preview. Why is that? The reason is that PNG images contain their own palette, while the formats native to Doom depend on an external palette. On our example, we have loaded doom2.wad as the base resource, so the global palette is set to Doom II's
Luckily, the Adrenix palette seems relatively close to the Doom palette in its color ranges, so the images here do not suffer too much from the conversion. The only way to avoid color degradation would be not to convert at all, but that restricts the mod to be only used with source ports that support PNG graphics. Anyway, click on "Convert All" and everything proceeds just as planned.
TexturesTextures are slightly more complicated. Doom creates "composite" textures from "patches" by assembling together different graphics. Let's say you have a large wall texture and a small switch texture. You can compose them together so that now you have a large wall texture, a small switch texture, and a large wall texture with switch, but the "new" texture hardly takes any disk space at all since it doesn't use its "own" graphic data. Doom creates a list of patches in the Here, however, the graphics are stand-alone, so all the textures we'll make will be composed of a single patch, making this system an extra complication to deal with. Fortunately, SLADE automatizes all this so it's still very simple. First, select the textures and copy them in between the You can see that depending on the colors used in the source picture, the image degradation can be quite severe. This is the perils of having to convert to the Doom palette.
Now that the images are all converted, we need to add them as textures. Select them all, then right-click and in the context menu, choose "Gfx → Add to TEXTUREx". This will automatically add them to the patch table, too. (Whereas if you choose "Add to Patch Table", it will not automatically add them to the texture list.)
Now is the interesting part. If you do not already have a
And here is why it is important to set a base resource archive. In vanilla Doom, the
So if you have not set a base resource archive yet, click on "Cancel" and set it up now, then start again. Be sure to select "Import from Base Resource Archive" then click "OK". Note how the texture format options become grayed out when choosing to import from the base resource; this happens because the format will be dictated by the format of the base resource.
Scroll down a little, you will see that newly-created
|